 Welcome to Google Compute Engine, a powerful cloud-computing platform from Google. Google Compute Engine is a cloud-based computing service that allows users to quickly and easily deploy virtual machines, or VMs, on Google’s infrastructure. This comprehensive guide will provide you with an overview of what Google Compute Engine is and how it works, and teach you how to get started with Google Compute Engine. By the end of this guide, you will have the skills and knowledge to confidently use Google Compute Engine to its fullest potential. Whether you are a novice user or an experienced developer, this guide will provide you with the knowledge you need to quickly and easily deploy virtual machines on Google’s infrastructure. Let’s get started!
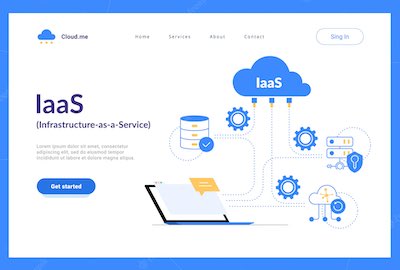
What is Google Compute Engine?
Google Compute Engine (GCE) is a cloud-based computing service that allows users to quickly and easily deploy virtual machines, or VMs, on Google’s infrastructure. As a user, you have full access to GCE’s infrastructure and can create and manage your own VMs using Google’s tools and services. This way, you don’t have to manage the hardware and can focus on developing your application or website.
GCE allows you to create VMs using a wide range of options and configurations, allowing you to find the perfect fit for your application or website. GCE’s VMs come with a wide range of services and features, such as networking, load balancing, autoscaling, auto-updating, automated patching, and many more.
Benefits of Google Compute Engine
Through this guide, you will learn about the many benefits of Google Compute Engine. Some of these include:
- Easy to use: Google Compute Engine provides an easy-to-use and intuitive interface that allows you to quickly deploy VMs and begin using them.
- Easy to scale: GCE’s virtual machines are designed to be easily scalable and flexible. This allows you to quickly increase or decrease the number of VMs in your environment, depending on your needs. You can also pause or terminate VMs to reduce costs and power consumption.
- Easy to manage: Manageability is key with any production-ready environment. With GCE, you can easily and efficiently manage your VMs’ configurations and settings, including the VM’s network settings, CPU and memory configurations, disk space, and more.
- High availability: GCE’s high availability ensures that your VMs are up and running at all times, providing optimal uptime and a seamless user experience.
- Automated and integrated services: GCE provides many integrated services, such as Google’s Console, an integrated development environment, and a wide range of pre-installed software. These services allow you to automate and streamline your VM deployment process and quickly and easily add new features to your VMs.
- Cost-effective: GCE provides a cost-effective solution that allows you to use Google’s infrastructure to power your application or website.
How Does Google Compute Engine Work?
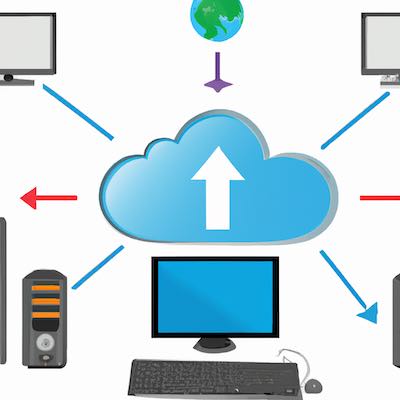
Google Compute Engine works by allowing users to create virtual machines on Google’s infrastructure. These VMs are powered by Google’s network and servers. GCE allows you to create and manage your own VMs using Google’s services and tools. You have full access to Google’s infrastructure, allowing you to take full advantage of GCE’s powerful features and services.
Google Compute Engine’s Networking is responsible for routing and transferring data between your VMs and the internet. Load Balancing enables GCE to distribute incoming traffic across your VMs so that your application or website remains online even if one of your VMs is experiencing problems.
Getting Started with Google Compute Engine
Before you can begin using GCE to power your application or website, you need to create a GCE project and VM instance. Let’s take a look at how to do this.
- Creating a GCE project: First, you need to create a GCE project. This is the first step in getting started with GCE. With a GCE project, you will be able to create and manage your VM instances, as well as access other GCE features, such as Google’s Console. To create a GCE project, visit Google Cloud and click the “Create Project” button. You will then be guided through a series of steps, where you will choose a project name, select a project location, and select the GCE pricing option that best suits your needs.
- Creating a VM instance: With your GCE project created, you are now ready to create a VM instance. VM instances are virtual machines that run on GCE’s infrastructure. With VM instances, you can scale your application or website’s computing power and capacity by adding more VMs. To create a VM instance, visit the VM instances page in your GCE project’s console. Here, you will select a VM instance type, which is the configuration of the VM you want to create. You can then select a VM instance name and a boot disk image, as well as configure your VM’s network settings.
Understanding Google Compute Engine Resources
Now that you have a basic understanding of GCE, it’s time to dive into the various GCE resources and understand how they work. There are several different GCE resources that you need to understand before you can start using GCE to its full potential.
- VM instances: VM instances are virtual machines hosted on Google’s infrastructure. With VM instances, you can quickly deploy scalable and cost-effective computing power to power your application or website. VM instances are the fundamental building block of GCE, providing flexibility and scalability.
- Networking: Networking is responsible for routing and transferring data between your VM instances and the internet.
- Storage: Storage is used to store VM instance backups, images, and other data on GCE’s infrastructure.
Working with Google Compute Engine Instances
Once you have created a VM instance, it’s time to configure its settings. You can do this by accessing your VM instance’s console. Once there, you can configure your VM instance’s settings, including the VM instance name, IP address, CPU and memory configurations, disk space, and network settings. You can also install operating systems, applications, and software on your VM instance.
When you install an operating system on your VM instance, you can choose from several different operating systems, including various Linux distributions and Windows. With your VM instance and its configuration complete, it’s time to deploy it to Google’s infrastructure. To deploy your VM instance, visit your VM instance’s console and click the “Deploy” button. You will then be guided through a series of steps, allowing you to quickly and easily deploy your VM instance.
Managing Google Compute Engine Storage
You can use Google’s storage to store and back up your VM instance images, logs, and other data. GCE’s storage services allow you to quickly and easily store and access your data across multiple GCE environments, such as different projects and zones.
To store data with GCE’s storage services, you first need to create a bucket. A bucket is a container that holds your data. Once your bucket is created, you can use it to store your VM instance images, logs, and other data. With GCE’s storage services, you can easily manage, access, and modify your data across multiple environments.
Securing Your Google Compute Engine Environment
One of the most important aspects of managing your GCE environment is securing it. Securing your GCE environment is essential for protecting your data and ensuring optimal uptime. To secure your GCE environment, you’ll need to put a basic level of security in place.
There are several ways you can secure your GCE environment. Some of these include securing VM instance access, using firewall rules, and using service accounts. With VM instance access, you can limit which VM instances can access your environment, as well as which environments a VM instance can access. With firewall rules, you can allow or deny network traffic to and from your GCE environment. With service accounts, you can use predefined accounts with specific permissions to access your environment.