Cloud servers have become an essential part of modern computing, offering businesses and individuals a cost-effective and efficient way to store, manage and access their data. If you're new to cloud servers and not sure where to start, this step-by-step guide will help you get up and running quickly and easily.
Step 1: Choose a Cloud Server Provider
Before you can begin using cloud servers, you'll need to choose a provider. There are a number of providers to choose from, including Amazon Web Services, Microsoft Azure, Google Cloud, and many more. Each provider offers different features, pricing, and support options, so it's important to do your research and choose the provider that best meets your needs.
To help you get started, consider the following factors when selecting a provider:
- Pricing: Cloud server pricing can vary widely, depending on the provider and the features you need. Look for a provider that offers transparent pricing, so you can easily see how much you'll be paying for your cloud servers.
- Features: Different providers offer different features, such as scalability, storage options, and security features. Consider what features are most important to you, and look for a provider that offers those features.
- Support: Look for a provider that offers excellent support, including online documentation, a user community, and 24/7 support via phone or chat.
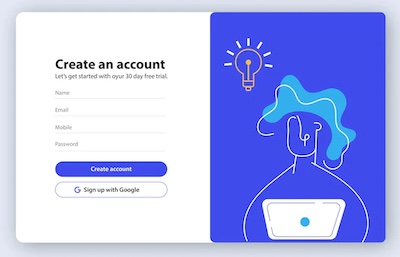
Once you've chosen a provider, you'll need to create an account and sign up for their cloud server services.
Step 2: Set Up Your Cloud Server
After you've chosen a provider and created an account, you can start setting up your cloud server. The specific steps involved will depend on your provider, but here are some general guidelines:
-
Choose a region: Most cloud server providers offer multiple regions where you can host your server. Choose the region that's closest to your target audience, or the one that offers the best features for your needs.
-
Choose an operating system: Cloud servers can run a variety of operating systems, including Linux and Windows. Choose the operating system that you're most familiar with, or the one that's best suited for your applications.
-
Choose the server size: Cloud servers come in different sizes, ranging from small to very large. Choose the size that's appropriate for your needs, based on factors such as the number of users, the amount of data you need to store, and the amount of traffic you expect.
-
Set up security: Cloud servers are vulnerable to hacking and other security threats, so it's important to set up security measures to protect your data. This can include using firewalls, encrypting your data, and setting up secure login credentials.
-
Install software: Once your server is set up, you can start installing software to run your applications. This can include web servers, databases, and other tools.
Step 3: Configure Your Cloud Server
Once your cloud server is set up, you'll need to configure it to meet your specific needs. This can include installing and configuring software, setting up user accounts, and configuring security settings.
To configure your server, follow these steps:
-
Install software: If you haven't already installed the software you need, do so now. This can include web servers, databases, and other tools.
-
Set up user accounts: Create user accounts for yourself and any other users who will be accessing the server. Make sure to set up secure login credentials, such as strong passwords or two-factor authentication.
-
Configure security settings: Set up firewalls, encrypt your data, and configure other security settings to protect your data from hackers and other security threats.
-
Set up backups: Cloud servers are vulnerable to data loss, so it's important to set up regular backups to protect your data. Your provider may offer backup services, or you may need to set up your own backup system using tools such as Amazon S3 or Google Cloud Storage.
-
Optimize performance: Cloud servers can be optimized for better performance, such as faster load times and smoother application operations. This can include setting up caching, optimizing server configurations, and using content delivery networks (CDNs).
Step 4: Connect to Your Cloud Server
Once your cloud server is set up and configured, you can connect to it using a remote desktop connection or through a web-based console. Your provider will offer instructions on how to connect to your server, but here are some general guidelines:
-
Remote desktop connection: To connect to your cloud server using a remote desktop connection, you'll need to download and install a remote desktop client. Your provider may offer a client, or you can use a third-party client such as Microsoft Remote Desktop or TeamViewer.
-
Web-based console: Some cloud server providers offer a web-based console that you can use to connect to your server. To use this option, simply log in to your provider's website and access the console from there.
Step 5: Manage Your Cloud Server
Once you're connected to your cloud server, you can start managing it. This can include monitoring performance, installing software updates, and managing user accounts.
Here are some tips for managing your cloud server:
-
Monitor performance: Keep an eye on your server's performance, including CPU usage, memory usage, and disk space. This can help you identify performance issues before they become major problems.
-
Install updates: Make sure to install software updates and security patches as soon as they become available. This will help keep your server secure and up-to-date.
-
Manage user accounts: Make sure to manage user accounts carefully, including creating new accounts as needed, revoking access when necessary, and monitoring user activity for suspicious behavior.
Conclusion
Setting up and managing a cloud server can seem daunting at first, but by following these steps, you can get up and running quickly and easily. Remember to choose a provider that meets your needs, set up security measures to protect your data, and regularly monitor and manage your server to keep it running smoothly. With a little practice, you'll soon be managing your own cloud server like a pro.